A practical guide to building cross-platform apps with Angular, Ionic, Capacitor, and Nx · Part 1 · Workspace setup and app initialization
November 29, 2024
This article is part of a practical series on building cross-platform apps using Angular, Ionic, Capacitor, and Nx.
- Part 1 · Workspace setup and app initialization (📍 you are here)
- Part 2 · Building a social feed
In this first part, I’ll guide you through setting up your workspace and running your app on the web and Android platforms.
Step 1: Initialize the workspace and application
To begin, you’ll create an Nx workspace, add Ionic and Capacitor configurations, and prepare your app for development.
1.1 Initialize the Nx workspace
Run the following command to set up your Nx workspace with the angular-monorepo preset:
npx create-nx-workspace@latest my-workspace --preset=angular-monorepoNote: 📌
Theangular-monorepopreset sets up a scalable workspace with Angular.
Choose ESBuild (recommended for faster builds) or Webpack during setup, and opt out of SSR, as Ionic apps use client-side rendering.
Enter in my-workspace directory:
cd my-workspace1.2 Add @nxext/angular-ionic
Next, install the @nxext/angular-ionic package, which provides generators for configuring and running Ionic apps:
npm install @nxext/ionic-angular -D1.3 Configure Capacitor for your app
Run the following command to add Capacitor configuration files for your app:
nx g @nxext/ionic-angular:configuration my-appAt this point, your workspace is ready to build and run your app.
Step 2: Running my-app on the web platform
Running your app in a web browser is straightforward.
2.1 Serve the app in the browser
Run the following command to serve your app:
nx serve my-appOnce the server starts, open the URL displayed in the terminal to view your app.
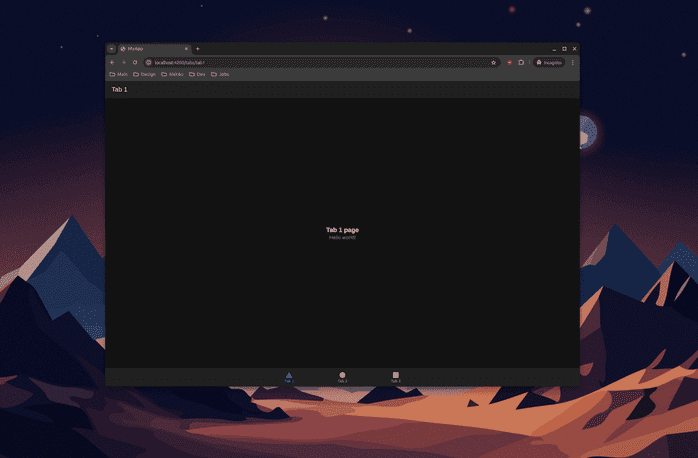
🌈 Ta-da! Your app is now running in the browser.
Step 3: Running my-app on the Android platform
To test your app on an Android device or emulator, follow these steps:
3.1 Install Android Studio
Download and install Android Studio to emulate or deploy your app on Android devices.
Note: 📌
Check the installation guide for more information: https://developer.android.com/studio/install
3.2 Add the Android platform
Add the Android platform to your app by running:
nx run my-app:add:androidThis command generates platform-specific files needed to run your app on Android.
3.3 Open the app in Android Studio
Use Nx to open your app directly in Android Studio:
nx run my-app:open:androidAndroid Studio will open, displaying a project view similar to this:
3.4 Run the App on the emulator
- In Android Studio, click the Run button (the green triangle).
- Wait for the app to build and launch on the Android emulator.
🌟 Congratulations! Your app is now running on an Android emulator.
3.5 Run the app on your connected device (optional)
Testing on a real device provides the most accurate results, as it replicates real-world conditions. Follow these steps to set up and deploy your app to a physical Android device.
4.0 Apply and test your changes on Android
After making changes to your app, ensure that your modifications are reflected on the Android platform. Rebuild your app to generate the latest build files:
nx build my-appSync changes with the Android platform:
nx run my-app:sync:androidThis updates the Android project with the latest build and configuration changes. Now, open your app in Android Studio again and re-run it to see your changes.
4.1 Setting up live reload for faster iteration
To enable live reload on an Android emulator or physical device, update your Capacitor configuration. This feature allows your app to reflect changes in real-time during development.
Update the Capacitor configuration
Replace your capacitor.config.ts with the following setup:
import { CapacitorConfig } from '@capacitor/cli';
import * as os from 'os';

const config: CapacitorConfig = {
  appId: 'io.ionic.starter',
  appName: 'my-app',
  webDir: '../../dist/apps/my-app/browser',
  bundledWebRuntime: false,
  server: {
    androidScheme: 'https',
  },
};

if (process.env.LIVE === 'true') {
  const localIp = getLocalIp();
  const port = process.env.PORT || '4200';
  config.server = { url: `http://${localIp}:${port}`, cleartext: true };
} else {
  Reflect.deleteProperty(config, 'server');
}

function getLocalIp() {
  const interfaces = os.networkInterfaces();
  const addresses = Object.values(interfaces)
    .flat()
    .filter((details) => details?.family === 'IPv4' && !details?.internal)
    .map((details) => details?.address);

  return addresses[0];
}

export default config;
Note: 📌
This configuration dynamically sets the server URL to your local network’s IP address when live reload is enabled.
Serve your app with live reload
Set the LIVE environment variable to true before syncing the Android platform:
LIVE=true nx run my-app:sync:androidRun the app’s development server and make it accessible on your local network:
nx serve my-app --host 0.0.0.0Finally, re-run your app in Android Studio. The app will now automatically reload as you make changes. 🚀
Conclusion
In this article, you’ve set up an Nx workspace, configured Angular, Ionic, and Capacitor, and successfully ran your app on the web and Android platforms. With these foundations in place, you’re ready to expand your app’s capabilities and target additional platforms. Stay tuned for the next part of this series, where we’ll dive deeper into building and deploying cross-platform features.


